I'm really sold on how environmentally friendly and affordable it will be, but will I feel the same when I'm too sleep deprived to face ANOTHER load of washing? Really, only time will tell, but one thing I've decided to do to make it a little bit easier (and cuter!) is to make my own adorable wipes to reuse, instead of the plain white squares that you see on the market. I've also run up some burp cloths, which are basically the same but about double the length. Of course, you can adjust the measurements to make any size or shape that you like!
What you need:
'Wipe' material of your choice (I've used towels, but you could also use flannelette, bamboo, microfibre, any other nice absorbent fabric)
'Decorative' material of your choice (this is just for looks, so any easy to handle material will do. Alternatively, you can use another absorbent material on this side in a different pattern to make your wipes handy on both sides!)
Complementary or contrasting thread
Sewing Machine
Pins
Measuring Tape
Chopstick, retractable pen or fat knitting needle
Difficulty:
Easy
Time:
Less than an hour per cloth
First, decide on the size you want for each of the cloths. The sizes I've used are as follows:
Burp Cloths
Material cut out - 42 x 21 cms or 16 1/2 x 8 1/2 inches (approx)
Finished product - 40 x 19 cms or 15 1/2 x 7 1/2 inches (approx)
Wipes
Material cut out - 21 cms x 21cms or 8 1/2 x 8 1/2 inches (approx)
Finished Product - 19cms x 19cms or 7 1/2 x 7 1/2 inches (approx)
*A note on materials* I've used a number of different materials, and get the impression that it is good to experiment a little to find out what works best for you and your bub. I've mostly used new towels on one side with a decorative cotton fabric on the other. I've also used flannelette on one side with new toweling on the other, and, for some extra eco-friendly ones, I've used an old towel (still in good condition, except for a hole that had been ripped in it) on one side with cut up cotton dress material on the other. You can also try things like microfiber, hemp or bamboo, but I've found those difficult to buy in my area and I'm too impatient to buy them online. If you're unsure which way to go, ask around your friends who have used cloth wipes, or have a look on some online forums or Facebook pages. My experience with other Mums is that they are more than happy to offer friendly advice, so don't be afraid to ask for it!
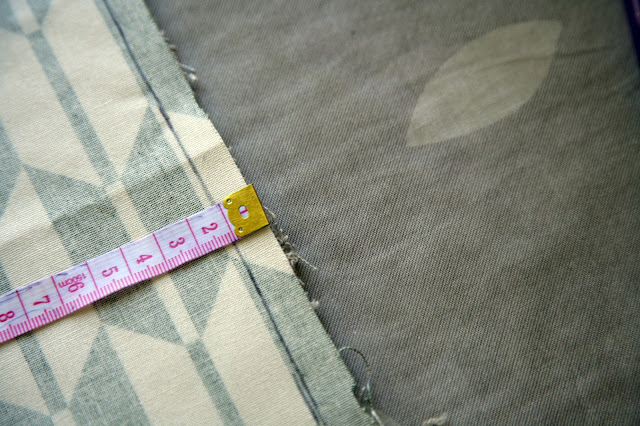
I would recommend washing and ironing your fabric BEFORE you begin - especially if you are using different materials for each side - to ensure they don't shrink to different sizes after their first use. Measure and cut the sizes that you need. If you have a specific wipes case or box that you would like them to fit into, then all you need to do is add approximately 2cm (or 1 inch) to the size that you want. When you're sewing, measure out 1cm (or 1/2 inch) seams around the edge, and you'll end up with the size that you need.
On the wrong side of the 'decorative' fabric, measure and mark a 1cm (less than 1/2 inch) border around the entire piece of fabric. I do this on the decorative fabric rather than the wipe fabric simply because it will be easier to do. You may not need to measure and mark this section out, but as I'm a bit of a beginner seamstress, I find this helps a lot to keep my stitches nice and neat.
Mark a section about 10cms (4 inches) wide for you to leave unstitched to turn the fabric inside out. I usually mark the beginning and end of this section clearly so that I can see it coming while I'm sewing.
Pin the wrong side of the decorative fabric to the wrong side of your wipe fabric.
Start sewing at one end of the gap you will be leaving. Make sure to back stitch so that it doesn't unravel when you turn the fabric inside out. I use a nice small stitch for this part (the second smallest that my machine offers) to help the cloths survive the many washes that they will no doubt go through.
Sew all around the edges of your fabric, along the lines you have marked. When you reach the other end of the gap you're leaving, be sure to back stitch again to make it nice and secure.
Using a blunt, pointed object (such as a chopstick or a fat knitting needle), poke the corners so they are neatly pointed out. Once you've sewn closed the gap, this will be near impossible to do!
Using some chalk, mark a guideline of approximately 1.5 cms (just over 1/2 and inch). Again, this might not be necessary if you have a good eye for sewing, but I find it handy to keep me on track.
All done! Easy as that!
Here's a pic of the reusable wipes that I've made - I have no idea what my favourite is, I love them all!
If you've made your own wipes and have any feedback on my design, I would love to hear from you. In the future I think I'll experiment with a few different materials to test their absorbency and how gentle they are.
Update
Here's some that I made with one side flannel and one side towelling, and I also plan to make some that are double flannel - I'm told this is best for getting into nooks and crannies!


No comments:
Post a Comment